• Skip to primary navigation
  • Skip to main content
  • Skip to footer

Let's Eat Smart

  • All Recipes
  • Breakfast
  • Lunch
  • Dinner
  • Dessert
  • Tips
  • About
  • Navigation Menu: Social Icons

    • Facebook
    • Instagram
You are here: Home / Tips / Sourdough Starter

Sourdough Starter

Sourdough starter is a fermented mixture of flour and water that is used to leaven bread. It is made by allowing wild yeasts and bacteria naturally present in flour to grow and multiply, creating a fermented mixture that is full of beneficial probiotics and has a tangy, sour taste. Not only is sourdough bread delicious, but it is also easier to digest than bread made with commercial yeast.

Making your own sourdough starter at home is a fun and rewarding process. It does take a bit of time and patience, as the starter needs to be fed and cared for regularly, but the end result is well worth the effort. Plus, once you have a healthy starter, you can use it to make all sorts of sourdough goodies, from bread and rolls to pancakes and waffles.

To make your own sourdough starter, you will need:

  • 1 cup (250g) wholemeal flour
  • 1 cup (250ml) lukewarm water

Mix the flour and water together in a glass jar or bowl. Cover the jar or bowl with a cloth or piece of muslin and leave it in a warm, draft-free place for 24 hours.

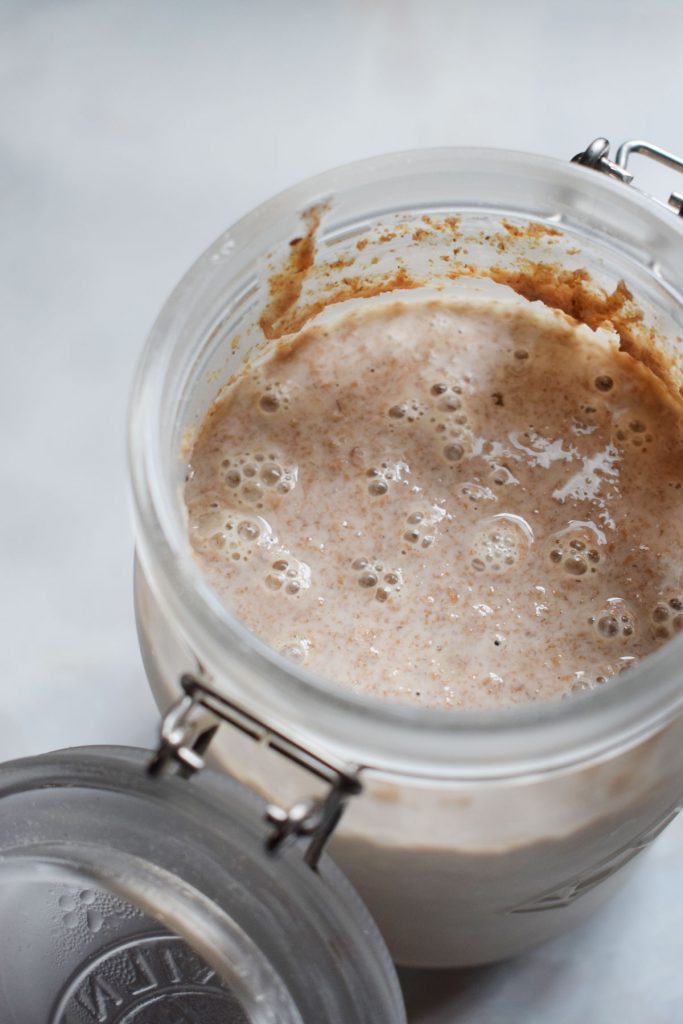
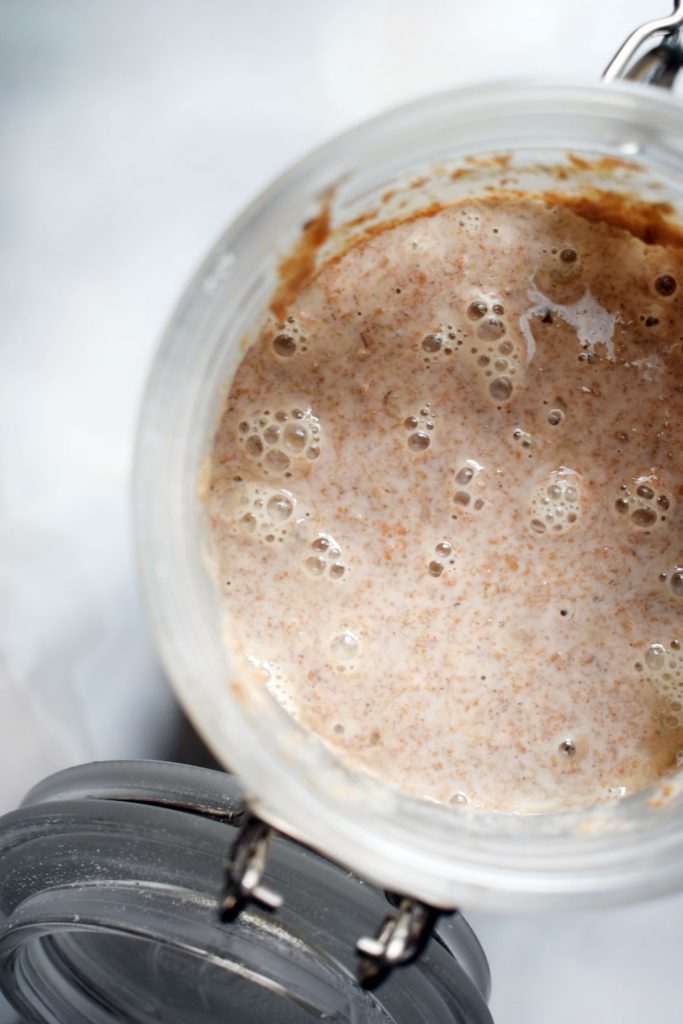
After 24 hours, the mixture should have started to bubble and become slightly thicker. This means that the wild yeasts and bacteria present in the flour are starting to multiply.

To feed the starter, add an additional 1/2 cup (125g) wholemeal flour and 1/2 cup (125ml) lukewarm water to the jar or bowl. Mix everything together well, then cover the jar or bowl and leave it in a warm, draft-free place for another 24 hours.

Repeat this feeding process every 24 hours for the next 5-7 days, or until the starter becomes active and bubbly. You may notice a pleasant, sour aroma emanating from the starter as it ferments. This is a good sign that your starter is healthy and ready to use.

Once your starter is active and bubbly, it is ready to use in your sourdough recipes. To use it, simply take out the amount of starter that your recipe calls for, then feed the remaining starter with equal parts flour and water (e.g. 1/2 cup flour, 1/2 cup water). Return the fed starter to a warm, draft-free place and allow it to rest for a few hours before using it again.

It is important to feed your starter regularly to keep it healthy. If you are not using it every day, you can store it in the refrigerator and feed it once a week. Just be sure to bring it back to room temperature and feed it a few times before using it in a recipe.

With a little bit of time and patience, you can easily make your own sourdough starter at home and enjoy the delicious taste and health benefits of sourdough bread. Happy baking!

See some of my sourdough recipes here:

  • Sourdough loaf
  • Sourdough baguettes
  • Sourdough breakfast scone
  • Sourdough banana bread

Share this recipe with your friends!

  • Twitter
  • Facebook
  • Pinterest
  • LinkedIn
  • Tumblr
Previous Post: « Vegan Chocolate Baked Donuts
Next Post: Vegan ‘Ferrero Rocher’ Style Cheesecake »

Footer

Take an insta peek

Vegan Herby Green Butter Beans 🌿🫘✨ Creamy, Vegan Herby Green Butter Beans 🌿🫘✨
Creamy, herby, zesty and packed with flavour!  Sauté leek, garlic & cumin, then simmer butter beans in their liquid with a stock cube. Stir in fresh dill, coriander, spinach & a spoon of vegan mayo. Finish with lemon juice, chilli flakes & a drizzle of olive oil. Pure plant-based comfort in a bowl 💚  🌱FIND THE FULL RECIPE & INSTRUCTIONS ON MY BLOG 🌱  #veganrecipes #butterbeans #plantbased #healthyvegan #vegancomfortfood #vegandinner #veganfoodshare #whatveganseat #simplevegan #veganlife #meatlessmeals #oilfreevegan #wholefoodplantbased #dairyfree #veganeats #crueltyfreefood #veganflavours #greenmeals #veganprotein #legumesofinstagram #easyveganmeals #seasonalveg #veganinspo #wfpb #onepanmeals
Homemade peanut butter in 3 steps 🥜✨😍 Roa Homemade peanut butter in 3 steps 🥜✨😍  Roast 200g peanuts at 180°C for 20–25 min, cool, then blend (add 3–4 dates if you like it sweet). At first, the peanuts will turn into a crumbly, sandy mix — but keep going! Soon it’ll be creamy and dreamy. Add salt to taste.  Store in a jar & enjoy for up to 2 weeks (if it lasts that long 😉).  #homemade #peanutbutter #easyrecipes #veganfood #vegansnack #plantbased #veganrecipes #whatveganseat #crueltyfree #dairyfree #healthyeating #veganprotein #veganlife #wholefoods #veganfoodshare #veganlifestyle #healthyvegan #simplevegan #veganeats #plantbasedrecipes #veganpantry #oilfreevegan #cleanvegan #veganinspo #nutbutterlove #vegancomfortfood
Vegan SNICKERS brownies!!! 💥 * 110 g melted v Vegan SNICKERS brownies!!! 💥  * 110 g melted vegan butter
* 140 g caster sugar
* 1/4 tsp salt
* 1 tsp baking powder
* 1 tsp vanilla extract
* 45 g cocoa powder
* 115 g plain flour
* 1/4 cup plant milk
* 80 g melted, good quality dark chocolate
* 2 @loveraw peanut caramel bars (gifted)
* 1/3 cup salted roasted peanuts
* 2 tbsp peanut butter  Instructions: 
* Preheat the oven to 160°C. Grease a 6-inch loaf tin and line with baking paper and set aside.

* In a bowl, mix the caster sugar, melted vegan spread, vanilla extract, cocoa powder, salt and baking powder.

* Once combined, fold in the flour, then add in the milk and melted dark chocolate and mix until combined.

* Chop up the peanut caramel bars into smaller, bite-size chunks.

* Add the chopped up bars and peanuts into the batter. Stir to incorporate.

* Transfer the mixture into the tin, roughly dollop the peanut butter on top, level the top with a spatula and bake for around 20-24 minutes.

* Cool completely before cutting into squares. These brownies taste delicious on the day they're made and even better the following day!  #peanutcaramelbar #loveraw #brownie #veganbaking #vegandessert #vegan #dessertporn #baking #foodblog #foodie #recipe #veganrecipe #veganrecipes #veganlife #vegansofig #brownielovers #brownierecipe #vegetarian #dairyfree #milkfree
AD gifted | Indulge yourself with this delicious v AD gifted | Indulge yourself with this delicious vegan ferrero rocher style cheesecake made with Love Raw hazelnut chocolate balls! They taste JUST like the OG choc but contain no palm oil, no artificials and are completely plant based. Recipe for this cheesecake landing on the blog at 8pm ✨  #cantbelieveitsvegan #vegan #veganuary #plantbased #dessert #vegancheesecake #loveraw #chocolate #yum #veganfoodie #veganlifestyle #vegancommunity #veganrecipes #veganism #veganeats #veganfoodporn #veganfoodshare #veganbaking #veganchef #veganlife #veganfood #vegandessert #veganyum #veganchocolate #veganhazelnut #vegancake #veganbake #veganbaker #veganinspo #veganfoodie #veganlover #vegancommunity
AD | Chewy, gooey, caramelised biscuit cookies 🍪  With crunchy caramelised biscuit wafer pieces from @loveraw  Makes 8
Ingredients
* 120 g golden caster sugar
* 50 g dark chocolate chunks
* 2 @loveraw caramelised biscuit wafer bars
* 1/8 tsp salt
* 200 g plain flour
* 1/2 tsp baking soda
* 60 g butter, melted
* 50 g caramelised biscuit spread
* 70 g golden syrup
* 3 tbsp water
Instructions
* Preheat the oven to 180C | gas mark 4. Line a baking sheet with baking paper and set aside.

* In a large bowl, combine the golden caster sugar, chocolate chunks and salt. Sieve in the flour and soda.

* In a separate bowl, combine the biscuit spread, butter and golden syrup. Once combined, add it to the flour mixture. Mix using a wooden spoon and bring the dough together using your hands.

* Divide the dough into 8 golf sized balls, flatten slightly and place on the baking tray. Roughly chop the wafer bars and gently push in a couple of pieces into each cookie. 

* Bake in the middle of the oven for 8-10 minutes. The edges of the cookies should feel firm but the centre will be still quite soft. Leave to cool for 15 minutes.  #biscoff #caramelisedbiscuit #cookies #chewycookies #chocoholic #dessertporn #vegandessert #vegetarianrecipe #recipe #foodporn #vegan #veganfoodshare #veganfoodporn #veganfood #veganrecipes #foodinspo #foodblog #foodie #foodshare #veganmealprep #veganism #foodinsta #fitspiration #cantbelieveitsvegan #cleaneating #diet #mealprepinspo #plantbaseddiet #bvsbackdrops
Crispy salt and pepper tofu with a super crispy sk Crispy salt and pepper tofu with a super crispy skin and a soft middle 🤩 4 simple ingredients, 20 minutes to make. My recipe for this bad boy will be available on the blog this evening!  Ad - Salt & pepper mills are @coleandmasonofficial (gifted with no obligation to post). How absolutely gorgeous are they?! My new favourite kitchen accessory 😍  #tofu #crispytofu #tofurecipes #tofulover #tofurecipe #vegan #veganrecipes #veganfood #veganuk #veganlife #veganism #coleandmason #saltandpepper #bvsbackdrops #foodphotography #foodstylist #foodporn #foodie #foodblogger #foodblogfeed #discoverunder5k #vegetarian #friendsnotfood #foodstagram #foodpicoftheday
Throwback to these vegan mille-feuilles I made las Throwback to these vegan mille-feuilles I made last year 😍 Find the recipe for these beauties on the blog 🤩 #millefeuille #millefeuilles #vegancake #vegandessert #dessertporn #vegetarian #vegetarianrecipe #recipe #foodporn #vegan #veganfoodshare #veganfoodporn #veganfood #veganrecipes #foodinspo #foodblog #foodie #foodshare #healthyfood #healthyeating #veganmealprep #veganism #foodinsta #fitspiration #czystamicha #cleaneating #diet #mealprepinspo #plantbaseddiet #veganvibes
This avocado, cannelloni & lime dip takes only 5 m This avocado, cannelloni & lime dip takes only 5 minutes to make and oh my goodness it is GOOD! Perfect for wraps or for dipping crackers or crudités!  You’ll need:
* 1 avocado 
* 1 can cannelloni beans
* 1/2 lime (juice only)
* 1 tsp tahini
* 1 tbsp extra virgin olive oil
* 1 small garlic clove
* Chilli flakes, salt, pepper and turmeric to taste  Instructions 
Scoop the avocado flesh into a blender or food processor. Add the beans, like juice, tahini, oil and garlic and blitz until smooth.  Season to taste!  #recipe #foodporn #vegan #veganfoodshare #veganfoodporn #veganfood #veganrecipes #foodblog #foodie #friendsnotfood #vegangirl #crueltyfree #vegansofinstagram #poweredbyplants #vegangirl #glutenfree #foodphotography #plantbased #foodstyling #homemade #veganmealideas #dip #bvsbackdrops #plantbasedfood #plantbasedrecipes #plantbaseddiet #veganuk #easyrecipe
Follow on Instagram

Recipes

  • Breakfast
  • Lunch
  • Dinner
  • Dessert
  • Gluten-Free

Quick Links

  • About
  • Affiliate Discretion
  • Privacy and Cookie Policy
Privacy & Cookies: This site uses cookies. By continuing to use this website, you agree to their use.
To find out more, including how to control cookies, see here: Cookie Policy

Copyright © 2025 Let's Eat Smart